The Bulk Import file can be downloaded by clicking this link: Bulk Import file - PrintAgents.csv
Filling out PrintAgents.csv
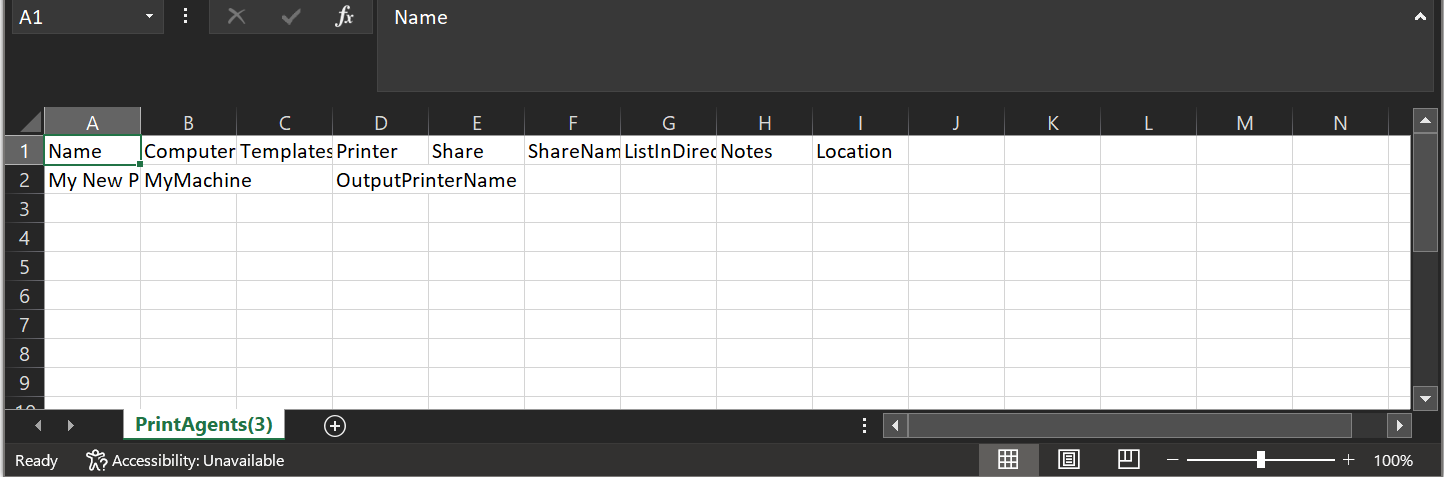
Column A – Name: Required field – This is the name of the virtual printer (example: PhysicalPrinter_RX). If the printer name extension(“_RX”) is defined globally, this field should just contain the Physical Printer name. Using the CONCATENATE function is useful for this field. Example: =CONCATENATE(D2, "_Rx")
Column B – Computer: Required field – This is the name of the print server as defined in the clients section of the admin portal (Admin >> Clients). This field is case sensitive and must match what is defined in the clients section. Multiple print servers can be defined by separating the entries with a straight-pipe(example: Server1|Server2|Server3).
Column C – Template: Required field – This is the name of the template to be used by the virtual printer and is defined in the Rx Templates section of the admin portal (Settings >> Rx Templates). This field is case sensitive and must match what is defined in the Rx Templates section
Column D – Printer: Required Field – This is the name of the physical printer the virtual printer will output to. The printer must be configured within print management of the print servers. If multiple servers are being used, the printer must be configured identically on each print server(ie. Must use the same port and print driver across all print servers).
Column E – Share: Required Field –
-
- TRUE: to share the printer.
- FALSE: the printer will not be shared
Column F – ShareName: Required Field –
-
- If Shared: The name should match the value from Column A in the row.
- Not Shared: Leave Blank.
Column G – ListInDIrectory: Required Field –
-
- True: The printer will be listed in the Directory
- False: The printer will not be listed
Column H – Notes: Optional Field – Notes will be shown in the Notes section of the windows printer entry in Print Management
Column I – Location: Optional Field – Location will be shown in the location section of the windows printer entry in Print Management
Once completed save the file.
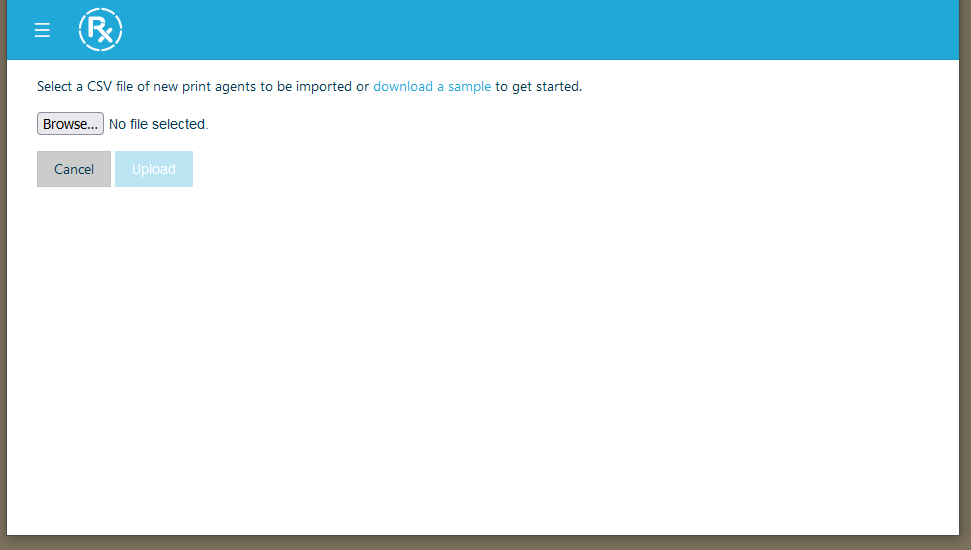
Importing Bulk Import File
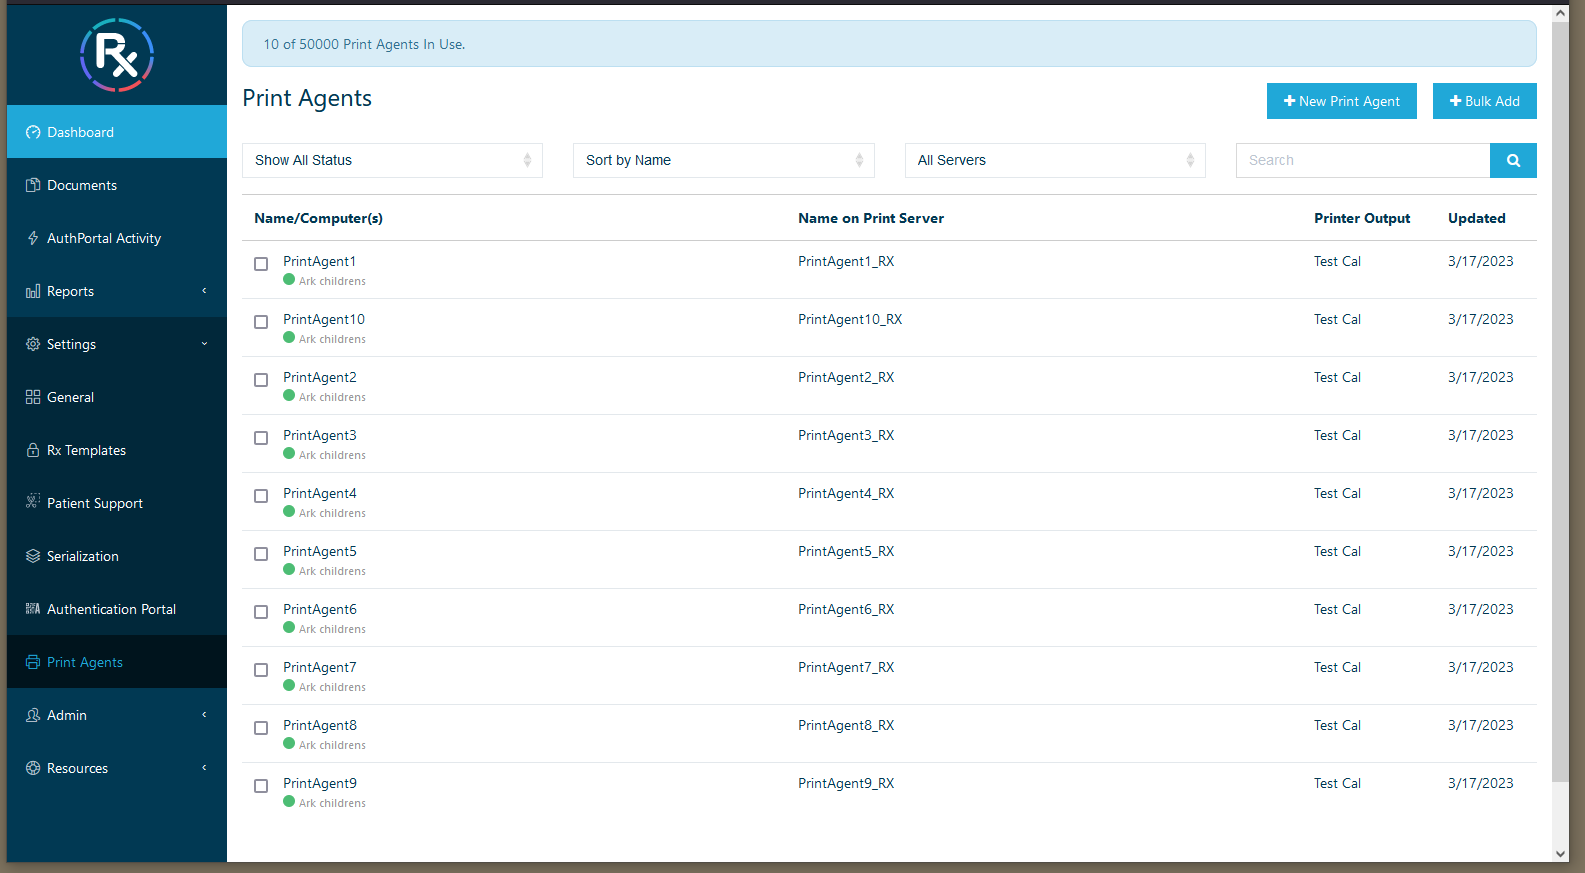
From within the SecureRx Administration Portal navigate to the Print Agents screen.
Click Settings:

Click Print Agents:

Click Bulk Add button in top right

Click Browse and navigate to directory where PrintAgents.csv was saved:
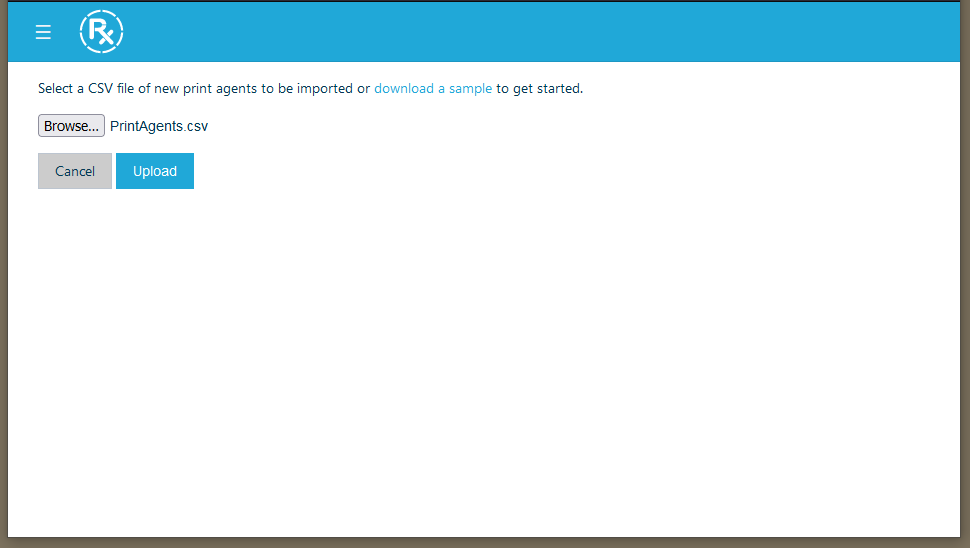
Click Upload:
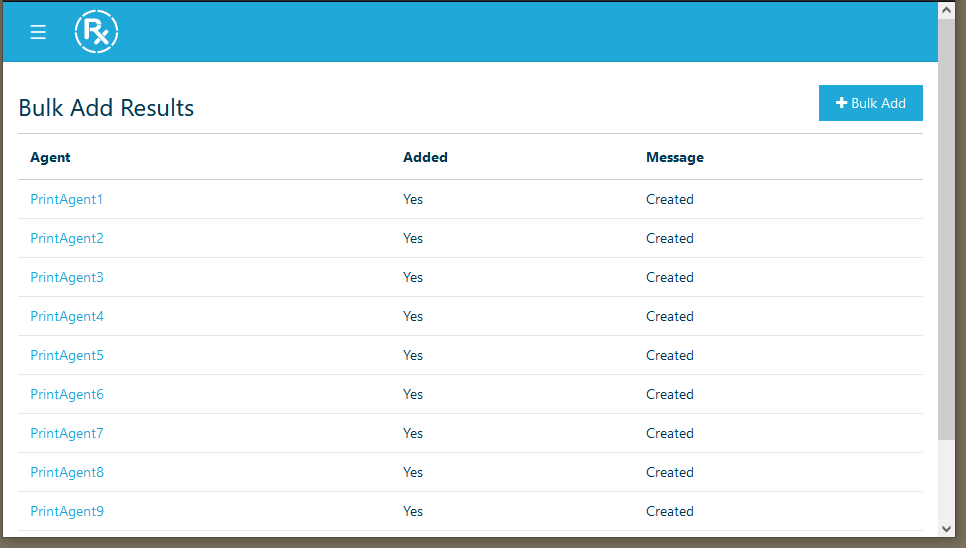
The Bulk Add Results window is shown:
Printers are now listed in Print Agents: