Print Match can also be used to establish “pass through” printing since documents that do not match the specified criteria will not have a Security Template applied to the print output.
- From within the visual designer, select PrintMatch from within the Data Capture menu.

- A PrintMatch region (A blue box) will be added to the document. Position the print match region over the area containing the data to use in the print match. You can reposition the region using drag and drop or using the X, Y, Height, and Width fields. You can also configure the Print Match region to cover the entire page using the Full Page checkbox.
Note: Setting the Print Match to Full Page should be used with caution. Your Match Rules will need to be highly specific to negate the higher likelihood of false positives.
- Click the Edit Match Rules button to open the Match Rules dialog.

- Print Match relies on one or more rules to trigger a Security Template. These rules can consist of contains, does not contain, or exact statements. Create each rule by selecting the correct statement and typing in the value to complete the statement. (e.g. “Contains Invoice” would cause the Security Template to be applied anytime the word Invoice is found within the Print Match region.)
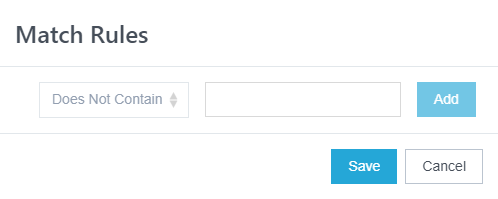
- Click the Add button to add the rule to the Match Rules list.
Note: A rule will not be applied to the template until you click the add button. Setting the rule and clicking Save does NOT automatically add the rule to the Security Template.
- Click the Save Changes button to save the template.